DIY a SID Synth

We are analog guys but we grow up with Commodore64 tunes . Our goal here is to document the assembling of a SID Synth, a synth based on the SID chip. The SID was the chip used inside the Commodore64 console. Have a look! Comments are welcome!

21 September 2009

SID_News_4

Well, all is done. Finally all is assembled into the enclosure as you can see from the photos.
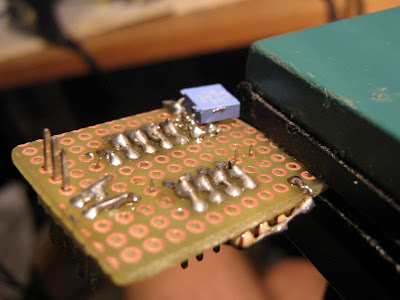
I had big troubles on programming the PIC18F452 because my programmer/burner (a Willem PCB5.0) didn't recognize the PIC, so i built the PicBurner module but i burned out an Schmitt trigger... Luckly i tried again with the Willem, this time i used the ICSP connection with the application WinPic, it seems something go fine, so i burned the PIC with the Bootloader.
After some voltage test i stuffed the PIC into the Core Module and i tried the MIOS upload but it didn't work so now i've to understand where is the problem. Surelly is the bad PIC programming. I will update this blog with news.

All in one.

Core and SID Modules.

LCD and push buttons' cables - Power switch.

PSU adaptor - Red cable 14 volts - Yellow 5 volts.

Stereo plug cabled.

MIDI out - MIDI in.

It's alive.

Labels: , ,

08 September 2009

SID_News_3

Here we are, yesterday i've finally decided the Tony's SidSynth style.
Also, i've finished the PSU adapter. It allows to use the original Commodore 64's power supply instead of building a new one.
It feeds 5 and 9 volts so with the PSU adapter we got 5 and 14 volts. 5v for the Core, 14v for the SID Core. There is a switch on the board, it turn on/off the SID Core. The power switch for the Core will be on the bottom side of the enclosure, not on the adapter board, you will see.
I will use old keys/buttons from an old keyboard layout (very old, surelly for a 286 pc). As you can see from the photos i've inserted 2 red square leds, there will be anothe one and i'm thinking about a blue one for the power. The red leds are only for live performance in a dark ambient as i know where Tony usually plays :-)

This is the final design.


Up side and down side of the PSU adapter


Just to show the "All cabled" thing between modules


23 August 2009

SID_News_2

Today I built the DINx1 Module. Is the module that permit push buttons connections to the Core module. I mounted resistors, SIL pins and IC cage on a veroboard.
Then I've make all the connections between the Core and the SID modules.
After that I've started to test the modules, but no lucky. Something goes wrong, an expected 5v didn't appear (on the Core IC) so now I've to check all the components.

SID module, pink and gray cables are recycled from an old TV; they are both shielded, like the RCA, because audio signal passes thru them.

  
Side to side of the DINx1 Module.

Labels: , , ,

18 August 2009

Finally something started...

Finalmente dopo anni di silenzio Gord The Rogue torna all'attacco del SID Synth.
Questa volta le cose sono più semplici. Un caro amico, Tony Light, ha commissionato la realizzazione di un SID Synth ad un singolo chip (SID 6581) utilizzando i circuiti già realizzati da Tony stesso. Qua sotto trovate delle foto dei vari lavori in corso.
---
Finally something started, a friend of mine, Tony
 Light, needs help on building a mono chip SID Synth. He gave to Gord The Rogue two circuit boards (preassembled) and Gord today started the project. Here there are some photos of the work in progress.

What we got from Tony (we = Gord) the two boards, Core Module and SID Module. 
The Core Module with the PIC18F452 // PCB layout version 2.

The SID Module with the MOS chip 6581.

The enclosure, it was a Genius® joystick with arcade buttons.

The diy LCD cable coming out from the Core Module board.

Positions of the boards into the enclosure.

Position of the LCD.

After some drilling.

Stereo plug (TRS or Jack) even if the SID Synth is mono.

Side view with the LCD mounted.

   MIDI IN & OUT holes.

Stereo out - Power supply plug - MIDIs

Labels: , , ,

23 September 2006

No new post cause broken photocam

I've broke my photocamera so i cannot post some photos of SIDSynth, sorry...

25 May 2006

How to start a DIY SIDSynth

Are you a Commodore64 lover?
If so this blog isn't for you, here we cannibalize C64s!!

The basic idea of this project is taken from
Thorsten Klose's site. Have a full reading of that site if you are interested on MIDI DIY projects, or just for fun.

We first want to build the synth with one SID's chip inside (read "Monophonic") and with the ControlSurface.

Se avete passato l'infanzia sul Commodore64 lasciate questo blog, qui infatti eseguiremo delle vere e proprie autopsie su queste mitiche console.
L'idea base è partita un giorno mentre cercavo sul Web un controller MIDI autocostruito e mi sono imbattuto nel sito di Thorsten Klose.
Questo simpatico personaggio, appassionato di elettronica, ha creato un bel pò di progetti/costruzioni relative al MIDI, dateci un'occhiata.
Per il momento il nostro intento è quello di costruire un SIDsynth con un chip (quindi monofonico) compresa l'intera console di controllo

17 May 2006

First Post is a first test

Ok here we go, we got a Blog, now we must have Posts :-)